Diva Express Guide: Achieve Perfection with Soft Gel Nail Tips at Home
Introduction
Ready to elevate your nail game right at home? If you're looking for a gel nail system step guide to achieve salon-quality results, you've come to the right place. The Diva Express Soft Gel Nail Tips Coffin Shape Kit is the ultimate solution for professional-grade, long-lasting nails that you can perfect on your own. Whether you're a seasoned nail technician or an experimental DIY enthusiast, this guide will walk you through every step to ensure flawless results, every single time.
Explore our full range of innovative products in the Fanair Brands Collection to complement your nail routine.
Why Choose the Diva Express Soft Gel Nail Tips Coffin Shape Kit?
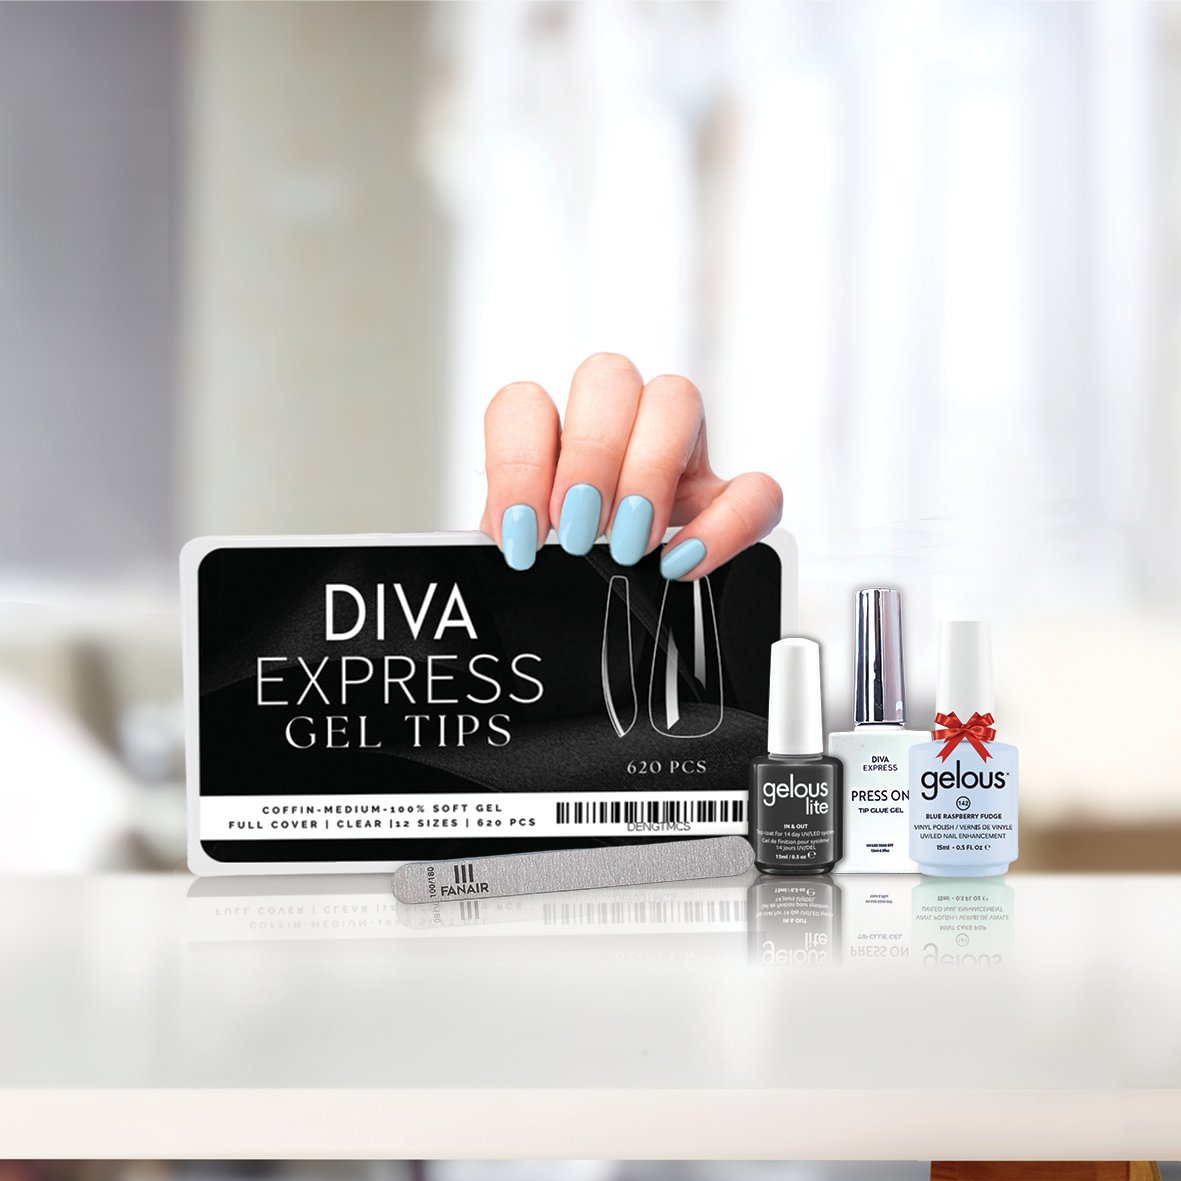
The Diva Express Soft Gel Nail Tips Kit is more than just a product; it's a complete transformation system. Here's what makes it stand out:
- Durability: These gel nail tips are impact-resistant, ensuring they stay intact under any condition.
- Professional-Grade Results: Achieve salon-quality nails at home in under 45 minutes.
- Versatility and Fit: With 12 sizes of soft gel tips, you can customize your nails for a natural look every time.
- Educational Support: Step-by-step video tutorials guide you through precise application techniques.
Perfect for both professionals and advanced at-home users, this kit simplifies intricate nail artistry, emphasizing both aesthetics and durability.
Step 1: Nail Preparation – The Foundation for Long-Lasting Nails
Before diving into the application process, nail preparation is vital to ensure strong adhesion and prevent lifting. Here’s how to prep correctly:
- Clean the Nails: Use a polish remover to eliminate oils and residual polish.
- Shape Your Nails: File your natural nails to the desired shape and lightly buff the surface to remove shine.
- Push Back Cuticles: Gently push back cuticles with a cuticle pusher to create a clean canvas for the soft gel tips.
- Dehydrate the Nail Plate: Apply a nail dehydrator to remove moisture, optimizing the adhesion strength of the LED-cured glue.
Step 2: Selecting and Sizing the Gel Tips
The Diva Express Kit contains 12 sizes of soft gel nail tips to ensure a perfect fit. Here’s how to select and size your tips:
- Measure each nail: Ensure the gel tip covers the nail edge side-to-side without overlapping or gaps.
- Refine tips, if needed: File the side edges or cut down the tips for personalized adjustments.
Ensure all tips are prepped and ready before moving to the application stage.
Step 3: Applying the LED-Cured Glue
The LED-cured glue is what sets this gel nail system apart. Here’s how to apply it correctly:
- Apply a thin layer of LED-cured glue to your natural nails.
- Using the kit's brush applicator, evenly spread the glue across the entire nail plate.
- Cure the glue under an LED lamp for the recommended time (usually 30-60 seconds).
This step provides a strong, tacky base for the gel tips to adhere securely.
Step 4: Attaching the Gel Tips
With the glue base ready, it’s time to attach the gel tips:
- Apply a small amount of LED glue to the underside of the soft gel tip.
- Align the tip with your natural nail, starting at the base and working your way to the free edge.
- Press firmly to squeeze out excess glue and prevent air bubbles.
- Cure the nail under the LED lamp for 60 seconds to set the tip.
For additional styling ideas, check out our Nail Art Tips Collection for inspiration.
Repeat this process for all nails, ensuring a perfect bond for each tip.
Step 5: Shaping and Refining the Nails
Once the tips are securely attached, it’s time to customize their shape and length:
- File Tips: Use a nail file to shape the nails to your desired design – whether that’s a chic coffin shape or a more rounded edge.
- Buff the Surface: Lightly buff the gel tip to prepare for polish application, ensuring even adhesion and a smoother finish.
Step 6: Adding Gel Polish for a Final Touch
The hallmark of a salon-quality manicure lies in its flawless polish application. Here’s how to do it:
- Apply a base gel and cure under the LED lamp for 30 seconds.
- Layer on your chosen gel polish color in thin coats, curing each coat for 60 seconds.
- Add the top coat for enhanced shine and protection, curing it for an additional 60 seconds.
For a pop of color and a unique finish, explore options like our Coconut Cream Gelous Vinyl Polish to accentuate your design.
Step 7: Maintenance and Removal
Maintaining your manicure is crucial for healthy nails. Here’s how to prolong your results and safely remove the gel nails when it’s time for a change:
- Regular Maintenance: Keep cuticles hydrated with cuticle oil and avoid using nails as tools to prevent chips.
- Safe Removal: Soak nails in an acetone-based remover, avoiding harsh filing or peeling that can damage your natural nails.
Remember to invest in quality tools for upkeep, such as a Machine Rotative Pro Tool for precision filing.
Expert Tips for Perfect Results
To master the gel nail system step guide with finesse, consider these pro tips:
- Practice aligning the gel tips before applying glue to perfect your placement technique.
- Use a dust-free cloth to maintain a clean working environment, avoiding particles that can affect adhesion.
- Experiment with designs and patterns—soft gel tips are versatile, embracing both bold and minimalist aesthetics.
- For added protection during application, consider using our Nitrile Gloves to ensure a clean, hygienic workspace.
Final Thoughts
Achieving salon-quality nails at home has never been easier. With this comprehensive gel nail system step guide and the Diva Express Soft Gel Nail Tips Coffin Shape Kit, you’re fully equipped to create breathtaking nails that combine durability with professional artistry. Whether you're prepping for a special occasion or simply pampering yourself, this system ensures stunning results. Ready to transform your nail care game? Shop the Diva Express Kit now!
Stay on trend by visiting our Newest Products Collection for the latest nail innovations.

